Why Change Themes
Sometimes we want to update to a more modern look, or we just want a change. But changing themes is not always easy, if you’ve created custom widgets for your sidebars.
This post is my process of changing themes; it might help you– and you might have a suggestion for me.
Always remember that the Edublogs help area is excellent! I love their documentation. Here’s the info on THEMES. And their support is the best ever when you’re stuck and totally mess up.
Key Point: Search “Edublogs Support Themes” — or whatever you’re needing help with.
My Dilemma
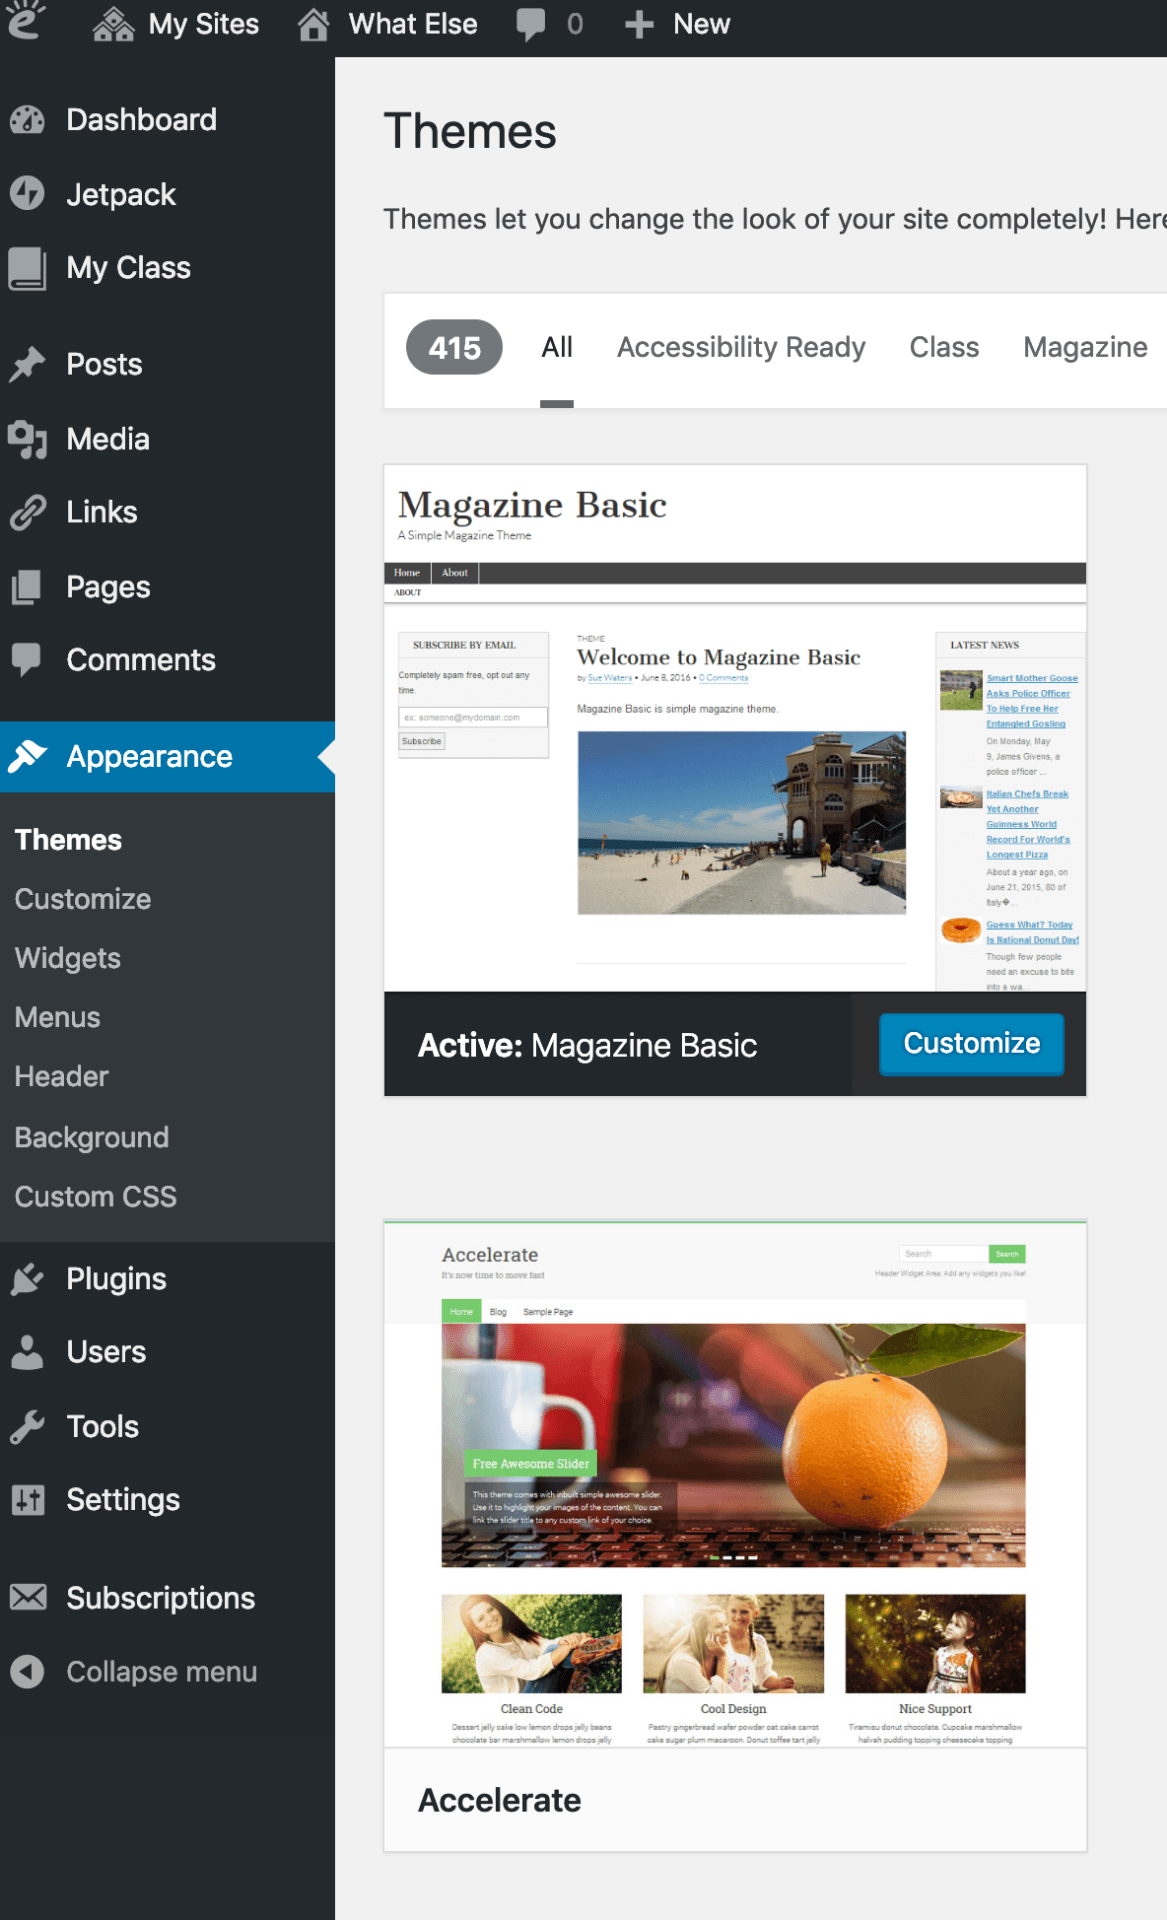
I like my theme: Magazine Basic. I chose it for it’s featured images, header, and sidebar. I like that the posts display in a column one after the other with a summary and featured image. I like that I have a right sidebar [many more choices with this theme] where I can add information for myself or my reader. I’ve written about my sidebar before– a couple: Sidebar Shuffle and Links Widget. I change and rearrange as my projects change.
But one thing I don’t like is the font size. It’s small, and it looks ridiculous to have these beautiful pictures and graphics that people can see and my text is tiny.
I could change the font size every time I type, but that’s an extra step every time I start a new section after a text heading.
Looking for Font Size Theme
There is no way to customize the font size of my theme for the “body” content, so I went in search of a similar theme. When I found it: I chose “Live Preview” and began to customize. Headers, colors, icons — all fine.
But then I looked at the sidebar. There were about four sidebars and footers available and all my widgets were dispersed among them, instead of just connecting them to the main right sidebar like they are on this blog.
Key point: Be prepared for changes.
Key point: You can fix the changes.
It was taking FOREVER to move widgets from one sidebar area to the one right sidebar where I wanted them. I knew it would be easier to use the dashboard instead of the “live preview.” In the dashboard I could drag from one sidebar to another.
Or so I thought.
Activating the New Theme
I dared to activate and save the new theme. That’s a scary thing and that is why the “live preview” and changes are so powerful. Most people would do fine on simple blogs without that sidebar stuff.
But… no. My needs are to have that sidebar with those links.
It was so ugly. There were widgets everywhere, and then the menus were also messed up. It was a mess.
But– I continued. I don’t give up easily; technology is so frustrating, but it is doable with patience. I’ve got patience galore.
Key Point: Be patient with yourself and your work.
I opened the dashboard and found that even though the new theme had shown in the “Live Preview” all my widgets separated into the different sidebar areas, in the new activated view, all my widgets were moved to the bottom of the screen in an “inactive sidebar” area. They were NOT in the easily draggable sidebars for the theme as they appeared in the “Live Preview.”
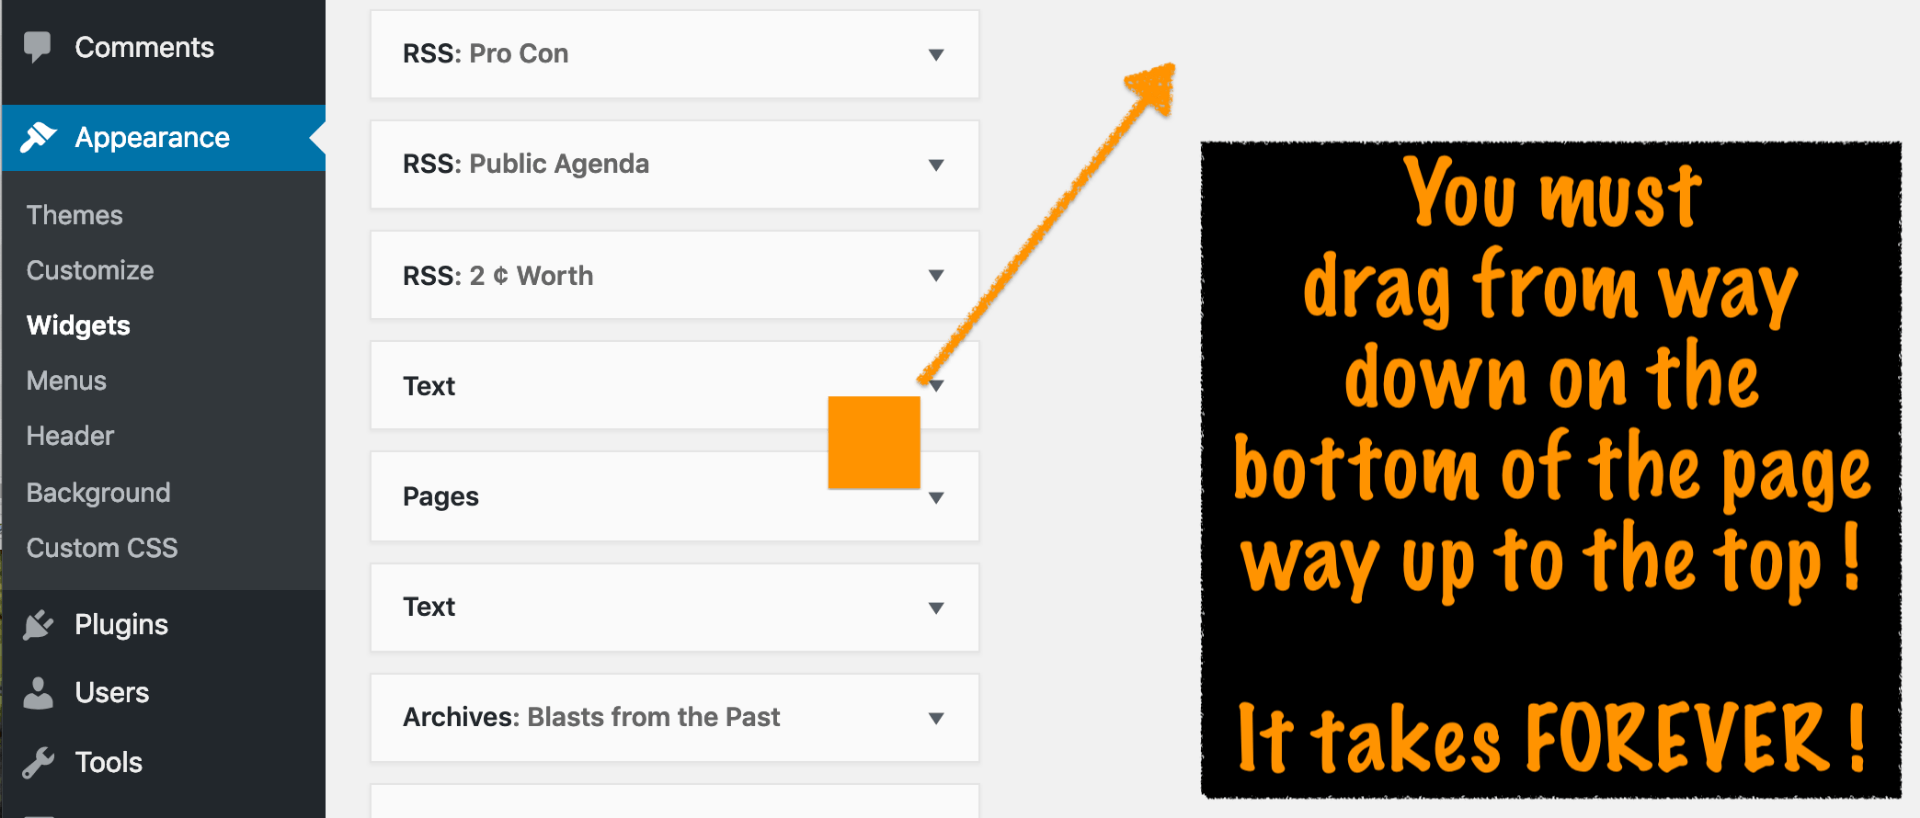
So this too was taking forever. I actually found it easier and faster to copy my text input from the inactive area, then go to the top, drag the text widget to the sidebar, and paste the old info into the new text widget.
Key point: always look for an alternative option.
But those menus— I didn’t realize the limitation on the menus in the new theme.
Key point: always look for what you need in the theme details.
I needed menu options, sidebar options. I had sidebar options, but there were only two options for menus — not what I needed.
I began to think of my options– alternatives. I could create a new page with all the widget type things I like and for the menu items I’d created in my original blog. There’s always a way.
Note: I can hear my mom now as I struggled with something, “Where’s there’s a will, there’s a way.”
The Way Through
I didn’t want to create those pages. Although I may eliminate my widgets and just create a page for the links I like to have handy.
I remembered that, at the bottom of the THEMES help document was a suggestion for dealing with font size and color through CSS – the code. I really did not want to mess with code, although I can read code and have done some coding. But messing with CSS is a risk — as the help page suggests: Custom CSS plug-in Help Page.
Key Point: You must know something about code to do this!
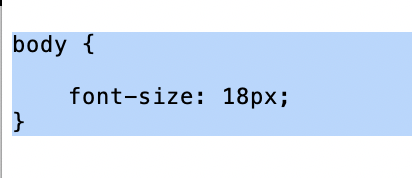
I checked around and found the info on font size on one of the pages that the Help Page linked me to: Text / HTML Dog. I copied the offered code and pasted it into a plain text editor [that’s Text Edit on the Mac and I think NotePad on a PC]. I made sure it was “plain text.”
Key Point: The code must be in plain text so there is no other code “in the back end.”
I deleted every part of the code except the part about font size, keeping in the body syntax:
I activated the CSS Editor Plugin.
I copied my plain text CSS code.
I clicked to “Appearance” —> “Custom CSS”
I pasted in the code.
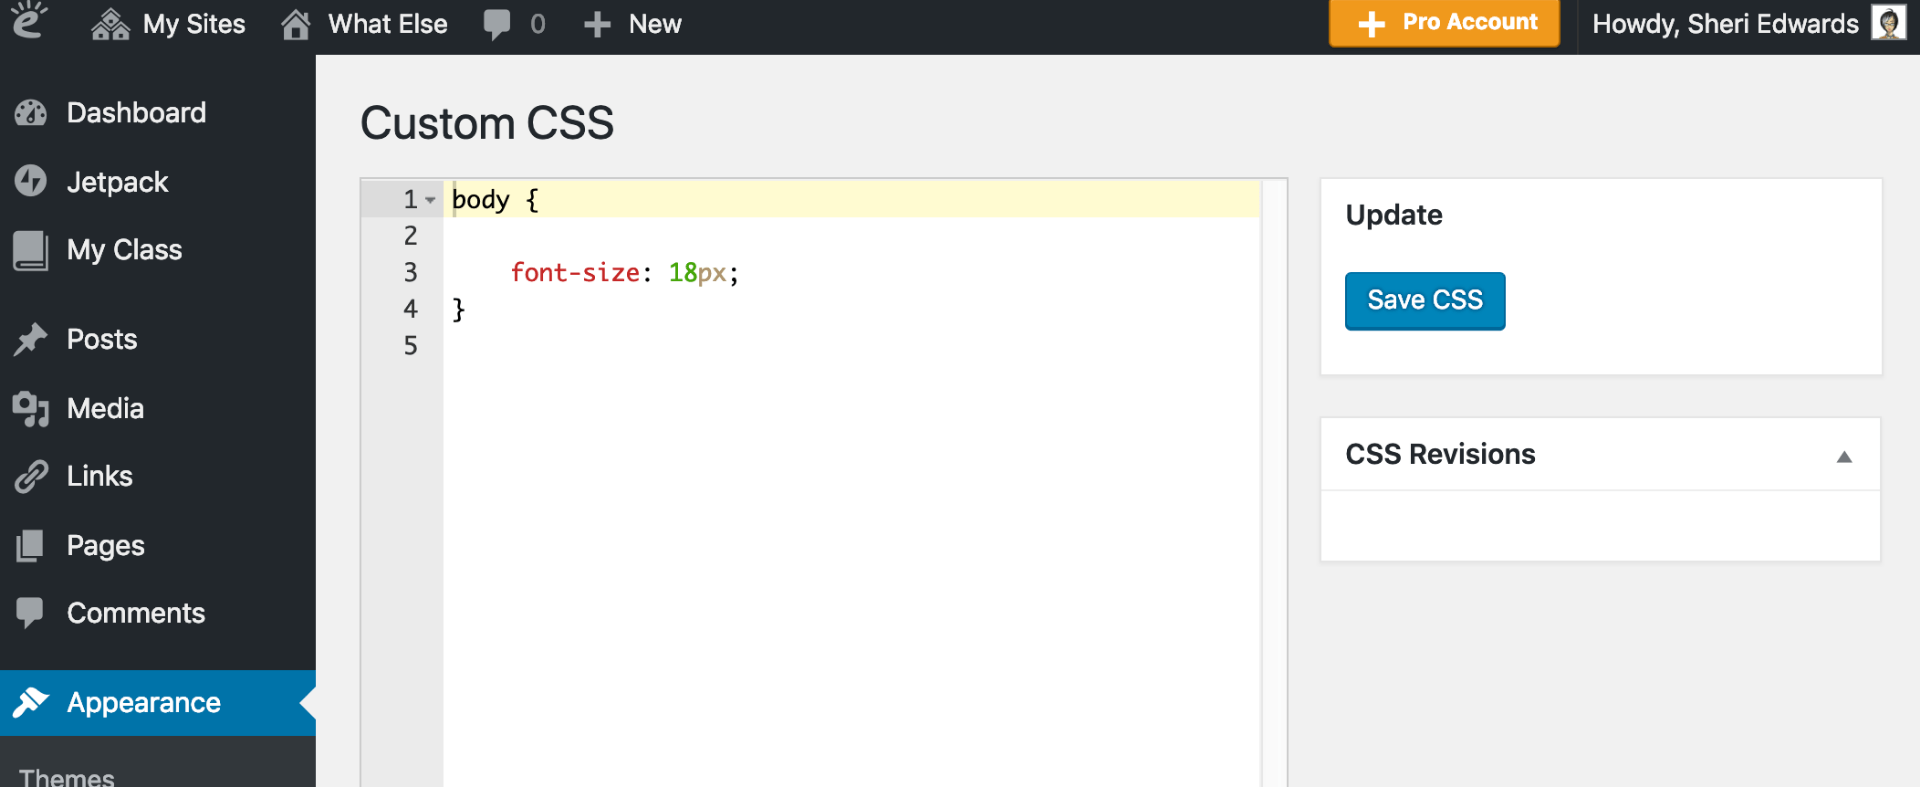
I clicked Save CSS.
I immediately when to a blog post, and wouldn’t you know it: larger font size.
WOW!
I did it!
Key Point: Another reason to know code!
Lesson Learned
Choose a theme you can grow with — one with options for menus and sidebars, and one that is “responsive” to many devices.
But if you need to change:
Key Point: Keep trying! Don’t panic! You can do it!
Key Point: Be brave and try something new!
If I hadn’t taken the opportunity to learn a little html years ago — learning something new — I wouldn’t have dared to do this little bit of code.
Whether you want to try a new theme, a new widget, or a new plug-in, go ahead and try it.
Key Point: You can fix most anything! Just do it!